Showing posts with label home. Show all posts

Sunday, August 17, 2014

Paleo Spaghetti Squash with Mom's Sauce

First of all, I'm slowly trying to update and personalize my blog. I'm not very computer savvy so this is challenging for me. I started with my hovering "pin it" button. Just hover the cursor over any picture and a "pin it" button will appear. Click on it to pin it to Pinterest. Easy Peasy! The latest feature I added is the "Blog Categories" list. You will find this on the right-hand side of my page. I really wanted to make tabs horizontally across the top, but couldn't figure it out. I would also like to see if I can make sub-titles so under recipes I can list appetizers, drinks, soup...

I just thought this was cute and wanted to share it.
 
Ok, on to the recipe!
 
Paleo Spaghetti Squash with Mom's Sauce
 
This is the sauce that I grew up with and now make for my family. The recipe was really easy to convert to Paleo. Of course I had it with regular spaghetti noodles and so did my family up to a couple of months ago. I wasn't sure what my family would think of the substitution, but they all really like it. My husband even prefers the squash! I do know there's no way my oldest son Peter would ever try it. He's married though and no longer my problem. :)
 
When I made this I really should have used grass fed beef, but I'm new at Paleo and still had regular beef in my freezer to use. I also made the mistake of putting garlic salt in the sauce. How bad could that be you ask? It has sugar. I just made this again tonight and used fresh garlic instead. I also used grass fed beef!
 

Ingredients:
1 large or 2 small spaghetti squash
1 lb. grass fed ground beef
1 or 2 gloves of minced garlic
1-15 oz can of organic tomato sauce (plus 3/4 can of water)
1-6 oz can organic tomato paste
1/2 t oregano
1/4 t basil
1/2 t salt
1/8 t pepper
1/2 t celery seed
 

This is the hamburger I use now!
 
To cook the squash, cut it in half length wise, scoop out seeds and place flesh down on a baking sheet. Cook at 375* for 45-60 minutes.

Brown hamburger and garlic in a skillet.
There's no garlic in this because I used garlic salt. Oops!
 
Add the remaining ingredients, heat thoroughly and simmer for 30 minutes. (Don't forget the water).

Favorite spoon!
 
Scrap the squash out with a fork and top with the sauce.


ENJOY!
Tips: The squash is really hard to cut. It helps if you have a sharp cleaver, or you can microwave it for a couple of minutes before cutting.
 
If you'd like you can add mushrooms, onion, shallots...
----------------------------------------------------------------------------------------------------
 
Here's an update on my Paleo lifestyle if you're interested. I went on 2 back to back vacations in July and ate whatever I wanted. I gained a few pounds but as of Thursday I only had 1 pound to lose. I've been good, but not perfect. I will be helping Nolan move into his dorm room at George Fox University on Thursday and will get serious again when I return. I'm also going to take up yoga. I've never enjoyed yoga, but am hoping I learn to. Flexible I am not!
 
This is where we ate in San Antonio. The creamed corn was delicious, but the meat was so so. I think I'm spoiled by Parker's wicked BBQ skills!

Vacation #2 in Whistler BC. Wonderlust (a yoga convention) was going on. There were a bunch of people in yoga paints carrying their mats around, decorated in really pretty tattoos and wearing flowers in their hair. I told my husband I was going to go home, take up yoga, get tattoos and become a hippie. 
 
So give the spaghetti squash a try if you haven't already and let me know what you think. It's really good!
 
 
Blessings,
Julie Wagner


Friday, August 8, 2014

Favorite Finds Friday - Giddy Up!

I've had my eye out for a vintage horse for a while. I did find one on Etsy that was $350.00 but it didn't look quite right so I passed on it. I was beginning to believe that's what I was going to have to pay if I really wanted one. Christen from www.blueeggbrownnest.com said that if you ever see a vintage horse you should grab it as fast as you can and buy it because they're not easy to find... and that's just what I did. She has some really cool ones! 

I'm always looking for something to do while getting my car serviced in Fife, so this time I decided to drive my loaner car to Sumner and treasure hunt. As I was walking down the sidewalk I saw an antique store in front of me with a lot of fun looking stuff outside. As I was crossing the street approaching the store I spotted my horse! I was so excited I might have started running a little bit. I grabbed it, went straight to the cash register and told the nice lady how excited I was to find it. (Probably not what you should do if you want to dicker with the price). I just couldn't help it! It all worked out though because she gave me 10% off just because she could tell how happy I was. The ticket price was $95.00 so I was pretty happy anyway! It really wasn't the color I wanted, but  I knew how to fix that!

 
 My plan was to paint the whole horse Graphite, then dry brush it with Old White.


This is what it looked like after a coat of Graphite.
 
 
I was planning on using Old White, but something was making me think French Linen. At this point I was planning on dry brushing a layer of French Linen, then dry brushing a layer of Old white. I liked it so much with the French Linen that I decided to forgo the Old White.
 
Ta da!


He has a stirrup missing on this side, but that's ok.
 
I think he looks a lot tougher this color.
 
I'm really happy with how he turned out! Now he just needs a name!
 
Here's some more treasures I found that day.
 
Corbel! It's bigger than it looks. 30" This will go in my guestroom that I'm redecorating in September. I can't wait!
 

I asked Nolan to put my corbel in the grass and take a picture of it. This is what he did. Lol.
 

Just an old scale, but I like it. I think I'll throw some Miss Mustard Seed Milk Paint on it and see what happens.
 
Nolan redeemed himself with this picture. Good job staging Nolan!
 
I saw this chair and thought it was the sweetest thing. I plan on taking the cushion off and replacing it with a flower pot. (I like how Nolan put the Annie Sloan paint can on the floor).
 
 
I think I'll name him Samson!
 
Blessings,
Julie Wagner


Monday, July 28, 2014

Vintage Bed Frame

I love love love this sweet little bed! I think it would be perfect in a girl's room or a guestroom for a fun shabby chic or farmhouse look.
 

This was the perfect day for an outdoor photo shoot! No staging necessary!

 
This bed was painted in Annie Sloan Chalk Paint (Paris Grey), lightly distressed and finished in AS clear wax. Sweet and simple!


This bed is looking for a new home so if you interested please let me know. It's full size and comes with slats. Enjoy your day!
 
Blessings,
Julie Wagner


Wednesday, July 23, 2014

Farmhouse Table

I am so happy with how this set turned out! It was really a lot of work, but well worth it. (I wish I had a before pic of it).   
 
Abbey (DIL) painted it and I did the distressing. It is painted in Annie Sloan Chalk Paint's Duck Egg Blue and Paris Grey.(http://www.anniesloan.com/)


The chair cushions are covered in burlap to give them a fun farmhouse look. (Fun fact: These chairs were donated by the Old Spaghetti Factory in Portland, OR to the thrift shop where we find a lot of our furniture).

 
Staging is something I'm still working on. The Miss Mustard Seed Blog (http://missmustardseed.com/) helps me a lot with this, but I don't hold a candle to her. Her photography is beautiful! One thing I do like is to add yellow! This is something I learned from my friend Kathryn who owns Common Folk Co. in Kirkland, WA. (www.commonfolkco.com). I really wanted to photograph this outside, but the weather just didn't cooperate today.
 
 
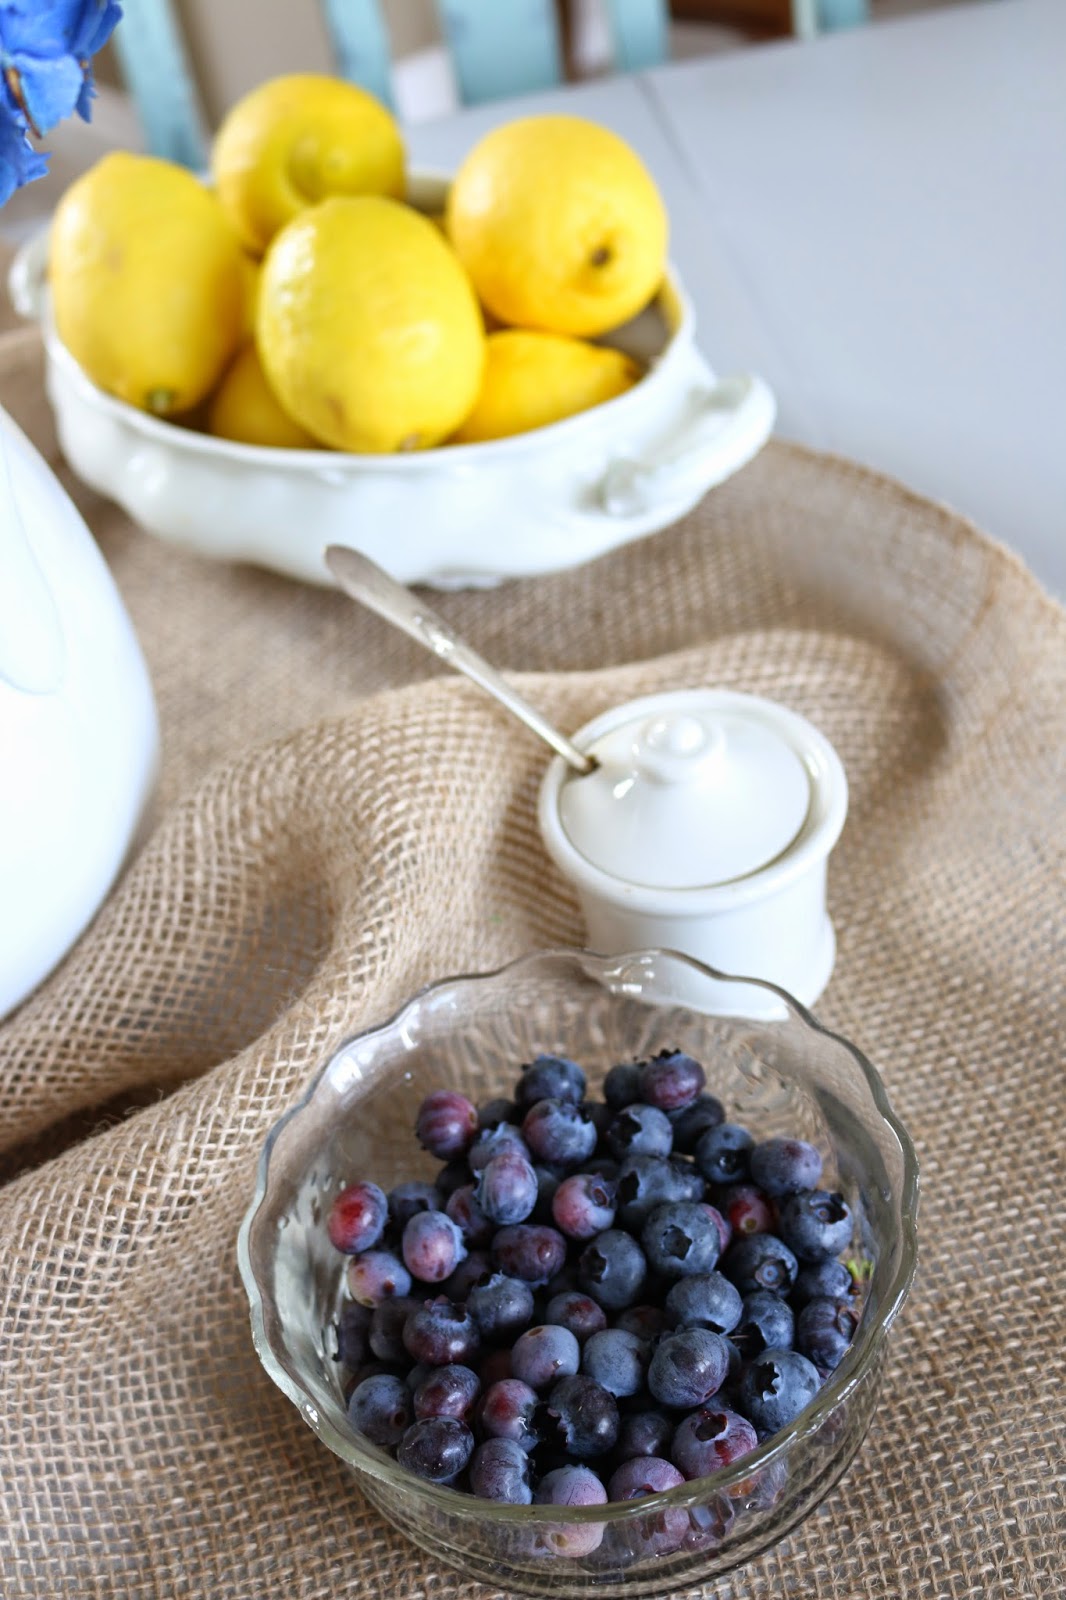
The blueberries are from my backyard! Yum! So are the hydrangeas.
 
 We have another table just like this (unpainted) that you could have custom painted to match your home. We also have a round one that's the same style. Super cute! Let me know if you're interested! This table is still available too.
 
 
Blessings,
Julie Wagner 


Monday, July 14, 2014

Change

First of all, check out the hovering "Pin It" button on the photos. I'm pretty excited about it! Second, I debated whether or not to blog about this. I know people don't always like to read about other people's diets and stuff, but this was really successful for me and I feel it's worth sharing. I was watching a show (I think it was Dr. Oz) and they were talking about Whole30 and "It Starts with Food" by Dallas and Melissa Hartwig. http://whole30.com/

 
I knew I needed to get a grip, and get it soon! I thought what the heck, and downloaded the book onto my iPad. If you haven't heard about Whole30, its basically the Paleo diet. After being really strict for 30 days, you start adding food groups back into your diet to see how your body responds to them. They mention how this is more about a healthy lifestyle than losing weight, but losing weight is one of the perks of a healthy lifestyle. One of the things I read in the book that really intrigued me was a story one of them told about their shoulder. To make it short, they read an article about how legumes cause inflammation and how people with rheumatoid arthritis have found some relief when cutting legumes out of their diet. They were already eating pretty clean, but decided to cut legumes out to see if it helped with their shoulder, and 6 weeks later their shoulder was pain free. My shoulder has been hurting for years! It hurt to put dishes in the cupboard and to take dishes out of the cupboard. It hurt when I vacuumed, mopped, cleaned the shower, did my hair, rolled up the hose.... It hurt pretty much all the time! Only 2 weeks into the Whole30 my shoulder was pain free. Woohoo! And yes, I lost weight, but that's not why I'm writing this. It's about how much better I feel.


Isn't he cute!
 
 
I decided to start the Whole30 the Monday after Nolan's graduation. (June 9). I was so ready for this and so excited to get started. I told my husband Peter that I couldn't wait until Monday and he said, "what's Monday"? "It's the day I start my diet". I knew I was going to be successful because I was so ready for this change. In the book they listed things that they didn't want us to do during this 30 days and in there I found my favorite line in the book. They said not to say "this is hard". Quitting heroin is hard, fighting cancer is hard, giving birth is hard. Drinking your coffee black, is. not. hard... To tell you the truth, drinking my coffee black is hard for me so I just drink tea now.
 
I told my family that I was going to start this Paleo diet and that for dinner they would be eating Paleo too because I wasn't going to cook 2 meals. They weren't too excited about this, but they have loved everything I've made thanks to these 2 cookbooks.


 The hardest part is the food prep. I guess it's not really hard, just time consuming. It is so worth it though. I tried to make my own mayo, but it wouldn't emulsify. I tried it twice and couldn't get it to work. I will figure it out though! Another oops I had was while eating out. It was Elijah's birthday dinner and we went to Mexican so Abbey and I could share fajitas without the rice, beans and tortillas of course. Well, the fajitas were served in a sweet and sour sauce. Who knew I was at a Mexican/Chinese restaurant. Oh well! The two other times I ate out during the 30 days I had grilled Mahi Mahi with a pineapple salsa and cedar plank Salmon. Yum!
 
Now that my 30 days are up I'm planning on sticking with the plan 90% of the time and allowing treats every now and then. Dallas and Melissa say it's ok to have treats when it's something special. They also say that a bowl of M&M's in the break room is not special and to leave them alone. On day 31 I went to the beach (it wasn't planned, just worked out best for everyone) and enjoyed beach food. I had clam chowder and saltwater taffy! The next day I had no problem getting back on track.


I really was a slave to food, and this program has worked for me. I hope this post will encourage you if this is something you struggle with.
 
Blessings,
Julie Wagner


Tuesday, June 24, 2014

Snickerdoodles!

Who doesn't love a Snickerdoodle (or 2 or 3)!?! My mouth is watering just thinking about them. Warm, chewy, cinnamon and sugary with a tall glass of cold milk or a steaming cup of the perfect coffee.... delicious! I even make a Snickerdoodle coffee creamer. I add 4 teaspoons of cinnamon to a new bottle of French Vanilla coffee creamer. Stir it up with a butter knife and shake like crazy. Ok, back to the cookies. I've had Snickerdoodles that really don't cut it because they lack what I feel is the key ingredient in this fabulous cookie. Cream of Tartar! Here's the recipe I love! It's an oldy but goody!

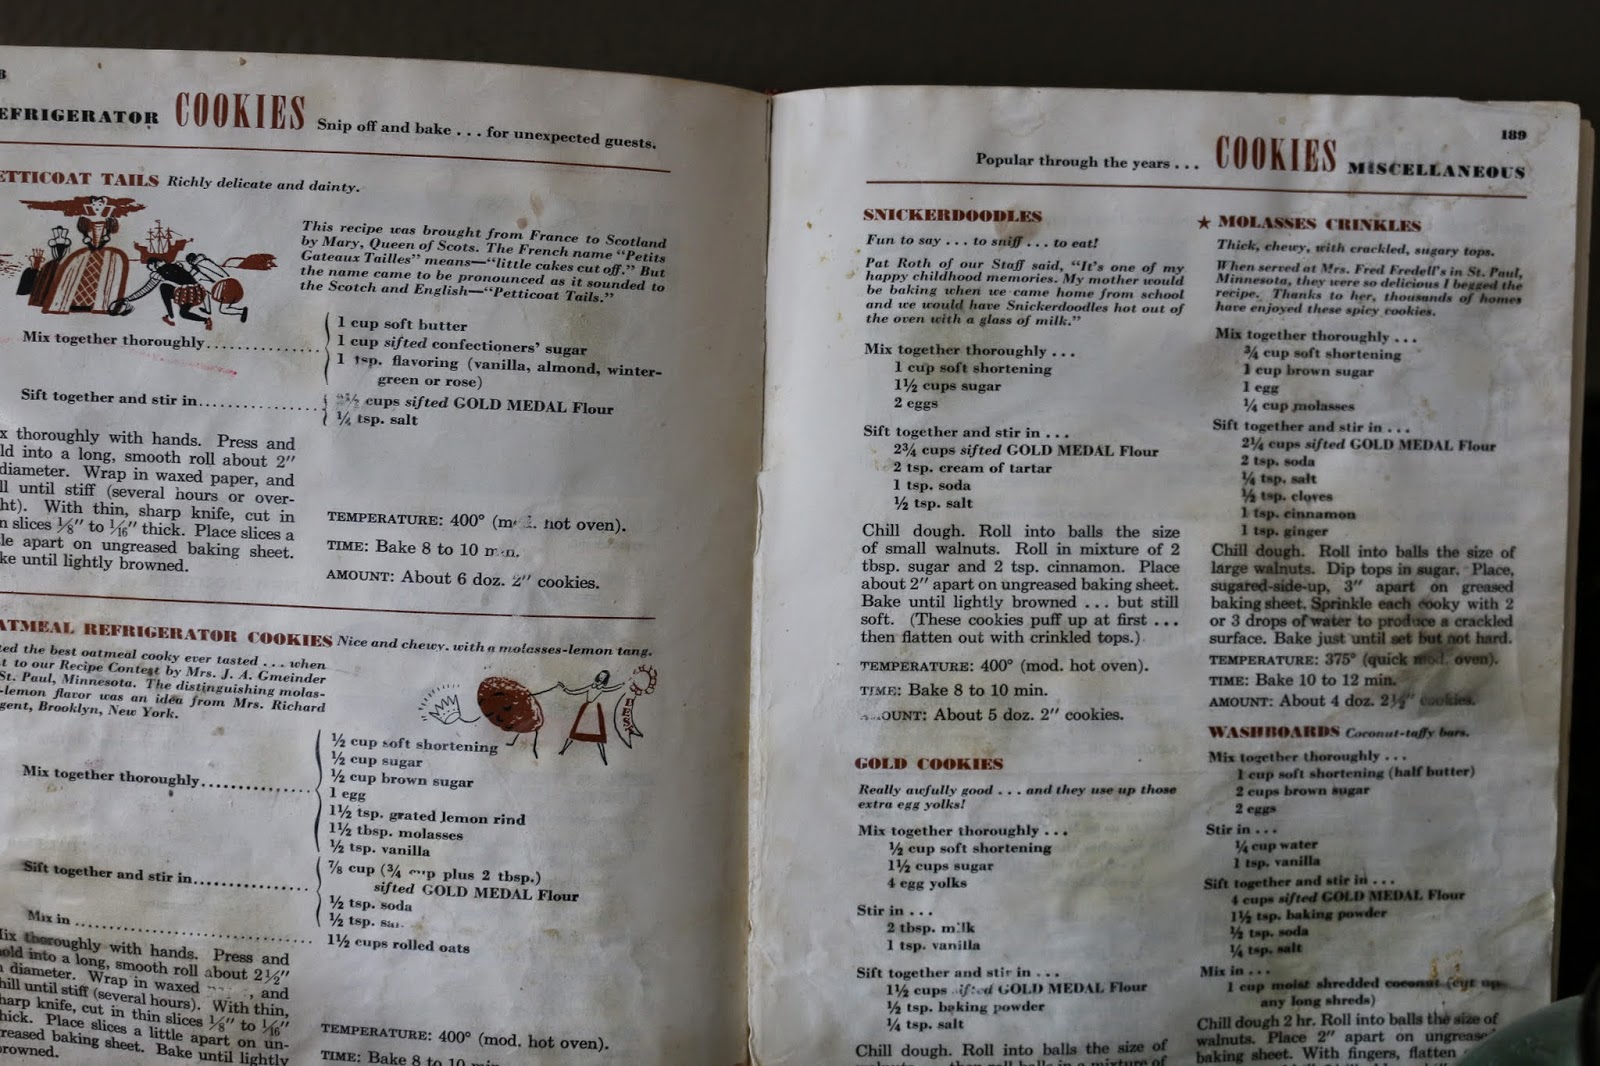
I believe my Grandma Bieker gave this to my mom and then my mom gave it to me when I moved out.
 
You can tell this page is used often and that I'm not a very neat cook! :)
 
Here's all the ingredients minus the cinnamon. (It seems like I always forget something). Oh well!
 
2 3/4 C flour
2 t cream of tartar
1 t baking soda
1/2 t salt
1 C shortening
1 1/2 C sugar
2 eggs
2 T sugar
2 t cinnamon
 
Sift together all dry ingredients and set aside.
 
I like to use kosher salt but any salt will do.
 
 
Mix together shortening, 1 1/2 C sugar and eggs.


I like to crack my eggs in a separate bowl before adding them to the mixing bowl to check for egg shells, blood spots or anything else funky that I don't want in my cookies.
 
I really like my Kitchenaid mixer!
 
Once the mixture is well mixed, carefully add the flour mixture. Mix until well combined.
 

Wrap in plastic and chill thoroughly.


This is Dash waiting for me to drop something for him. He's so cute!
 
Preheat oven to 400*. In a small bowl mix together the 2 T sugar and 2 t of cinnamon. Roll dough into walnut size balls and roll in cinnamon sugar mixture.


I like to line my baking sheet with parchment paper. I feel you get a chewier cookie. Or just use an ungreased cookie sheet.
 
Bake for 8-10 minutes. Be careful not to over bake! I usually go in half way through the cooking process and lightly smash the cookies with a spatula.


Ok, three! :)
 
Blessings,
Julie Wagner